Related Resources: 3D Printing
Bonding 3D Printed ABS Parts Together
Bonding 3D Printed ABS Parts
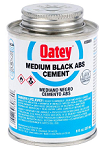
There are several options available for bonding ABS parts together, including readily available consumer products. Most hardware stores will have commercial grade cement available within their plumbing department. Unfortunately, black ABS cement is usually the only color option available.
Should you need a different color for cosmetic reasons or are just ambitious an ABS cement can be manufactured with a your filament and Acetone.
Make your own ABS Cement:
- Glass jar with an air tight lid - a small jar will do.
- Add the ABS material used within you 3D print, for 2.85 mm filament, we recommend about about 1 inch (25 mm) per 1 in2 (25 mm2) of area required to be bonded. Approximately double the amount for 1.75mm diameter filament. Cut the filament into small enough lengths so the material mostly lays flat (stacked logs) on the bottom of the glass jar.
- Pour enough Acetone into the small jar to fully cover the filament
- ABS will take some time to completely dissolve in acetone, therefore smaller amounts you use the quicker the results.
- Wait and stir. Repeat until all the ABS is dissolved.
- Be aware that thin or thick slurries of ABS Cement may be required for you application just use less ABS or more Acetone to make a thinner solution.
- When cementing the ABS parts together, first clean all surfaces that will contact when bonding together.
- For some applications score the contacting surfaces using a file, knife or low grit and paper. Don't forget to clean the abrasion bits off the contact surfaces.
- Using a small painters brush that are typically available at hobby stores or similar, brush ABS cement onto the contact surfaces.
- To ensure the you parts cement together properly apply a compressive force for not less than fifteen minutes this will ensure that the Acetone has evaporated and the the bond is complete.
Direct ABS Acetone bonding is also possible.
- Apply acetone directly unto the contacting bonding surfaces until a noticeable surface softness occurs.
- The parts can then be pressed together to achieve the bonding fusion. Compression should be applied for approximately 15 minutes.
- Do note that some surface glazing will occur where over brushing the acetone onto the visible adjacent surfaces.
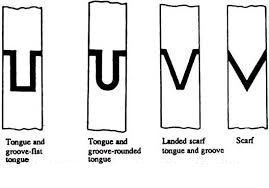
Bonding Grooves can be used to increase bonding surface area. Groove and projection grooves can be a great way to increase surface bonding area and minimize flow out of ABS cement or over brushing on direct surfaces. Depending on your 3D printer manufacturing tolerance capabilities, design a mating groove and tab with about .015" (0.375 mm) clearance.
- Learning to Get Great 3D Prints
- 3D Printing with ABS Filament
- 3D Additive Printing Manufacturing | 3D Additive Printing Manufacturing
- Storing ABS and PLA 3D Printing Filament
- Storing ABS and PLA 3D Printing Filament
- 3D Printing for Superalloys
- 3D Printing Manufacturing of Aerospace Alloys
- Mostly 3D Printed (Plastic) Router CNC built in house
Link to this Webpage:
© Copyright 2000 -
2024, by Engineers Edge, LLC
www.engineersedge.com
All rights reserved
Disclaimer |
Feedback
Advertising
| Contact